

I've put together a little tutorial for my homemade stamps at the urging of my friend and Creative Sistah Stephanie of Dragonfly Design Studios.
These "green"and grungy stamps are fun to make and might just fill a little niche that you may need but don't know you need it yet ;) They are made from the packaging that ground beef, pork or chicken comes in and I've also used a styrofoam box that I brought some left overs home from my favorite Mexican Restaurant.
So here we go...
Here's what you'll need. Sorry, I forgot to add in the ink pad...

Start with your recycled foam. Here I've used the lid from a white styrofoam box.


I started with a sketch of a key (in sketchbook) that I thought I might use for something. You don't have to do this, you can just draw straight on your foam and that's what I usually do, but for simplicity's sake, here is a little sketch. Don't forget your drawing will be in reverse.
I put the foam under my sketchbook page and traced over the top of it to dent in the foam, then I traced it with a black marker so you could see it easier.

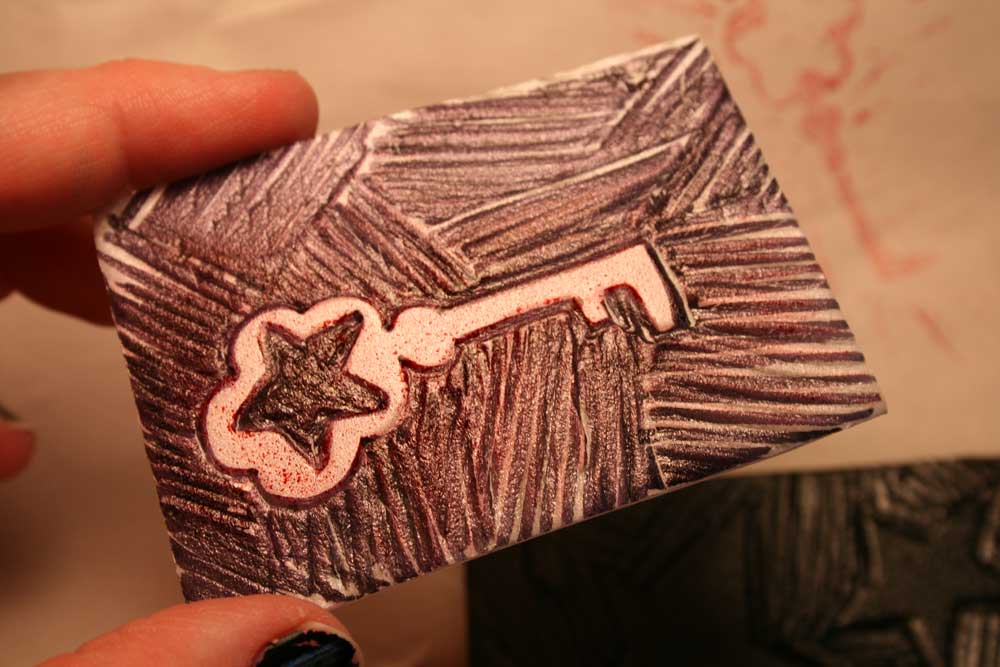
Then you may want to shade in the parts you want to "carve" out with a sharpened blunt tool like this pencil... it worked great. This kind of stamp looks like a wood carved stamp to me, so make sure you add interesting "cut" marks. I did this by drawing the background with lines going different directions. This will show up on your inked stamp.

"Carve" out your design by drawing with a little pressure to dent in the foam. The white that is left over will be what the ink adheres to.

 |
| Carved ~ See all the dents? |
 |
| stamped on cheap packing paper recycled from a purchase |
 |
| Stamped in my sketchbook along side of initial sketch |
 |
| Black meat packaging foam |
 |
| white foam on top and black on bottom |
Here's the stamp I made from the recycled black meat foam packing after I discovered the white really didn't work out so great. I just free handed the stars on the foam real quick, which I usually do anyway and they generally turn out better! haha

Not sure if you can see how much deeper the cuts are (above), but it is fairly significant. So if you plan to do this, do your own experiment or just learn from me here and use the black.
Here's the imprint it made... yee haw!
The foam makes the stamp look mottled and grungy and the cut marks just add to the charm. I love it. This is not for intricate designs, for that get some Speedball Speedy Carve foam and a Speedball Linoleum cutter from the craft or art store, I like Blick Art Materials myself unless you've got yourself a 40% off coupon from Michaels, then get it there!
I hope you've enjoyed my first tutorial! :) Feel free to email me with any questions.
Happy stamp creating!


What am awesome tutorial. :)
ReplyDeleteI love your stars :)
You are making me want to get out all my stamps and make some cards (of course, I didn't make any of them! :(
But stamping is such fun and I haven't done it for ages.
I do usually stamp all my Xmas cards with a snowman seal :)
Have a lovely evening, great inspiration, cheers, T. :)
Great stamps. Love the stars. I haven't used stamps in a long time. Nice job.
ReplyDeleteLove.
ReplyDeleteI don't have that black foam, but the whit stuff from cookies from the Farmer's Market.
I always save it for a paint palette, but I wanna try this! I need a blackbox...
Love!
This tutorial and awesome and easy! It is so much cheaper to use foam than those linoleum cuts from craft stores...plus they are so much harder to work into.
ReplyDeleteHow cool! Next meet tray I get I will be keeping and trying this!
ReplyDeleteThis a fabulous tutorial, Jaime! Thanks so very much. And that fact that you chose stars is even cooler! Happy weekend to you - it's great to be visiting with you again!
ReplyDeleteGreat tutorial ! I used to use those foam plates with kids too, because they can be carved so easily.
ReplyDeleteHappy Sunday, Jaime !
I just came across this- great tutorial! And I have to say that I thought the key design came out pretty good too! Both look great to me!
ReplyDeleteThanks for sharing this!